
Recently I started having an issue with my Lexus IS350 when trying to stop or slow down the car. The steering wheel and the brake pedal started vibrating when applying brakes at higher speeds. I’ve also got “Check Brake System” warning indicator light on the dashboard. I’ve suspected the warped rotors, but I wanted to properly diagnose the problem. You can do that by measuring brake rotors runout.
A dial indicator tool can be used to measure brake rotor runout – the lateral movement or deviation of the brake disk as it rotates. Normally brake rotor runout cannot be more than 0.002 in. If runout exceeds factory specified maximum allowed value, the brake rotor can be turned, as long as it meets the minimum required thickness value. If the rotor thickness is less than the factory specified minimum required thickness, it should be replaced. Let’s take a look at how to check brake rotors runout using a dial indicator tool.
Why you should always check runout
- If excessive runout is not diagnosed properly, you might be frequently replacing brake pads and rotors instead of addressing the underlying cause of the issue.
- You should measure runout every time you remove the wheels and brake rotors as a preventative measure to save yourself a lot of time and money.
- Excessive runout will cause uneven rotor wear or warpage.
- Brake rotor warpage may cause a brake pedal pulsation or steering wheel vibration when applying brakes. You may also get a BRAKE warning light on the dashboard.
- You can measure runout when installing brand new brake rotors or wheel bearing hubs to make sure you are getting quality parts. Cheap aftermarket parts aren’t always built well to meet the factory specifications.
What can cause excessive runout
- over-tightening the wheel lug nuts by exceeding factory torque specs
- not tightening the wheel lug nuts equally
- not tightening lug nuts in a star pattern
- poor quality brake rotors, bearing hubs or brake pads
- seized brake calipers
- uneven brake rotor wear
Required Tools
- Dial indicator
- Brake disk micrometer
- Floor jack
- Jack stand
- Wheel chock
- Wrench and sockets
- Torque wrench
Types of dial indicator tools
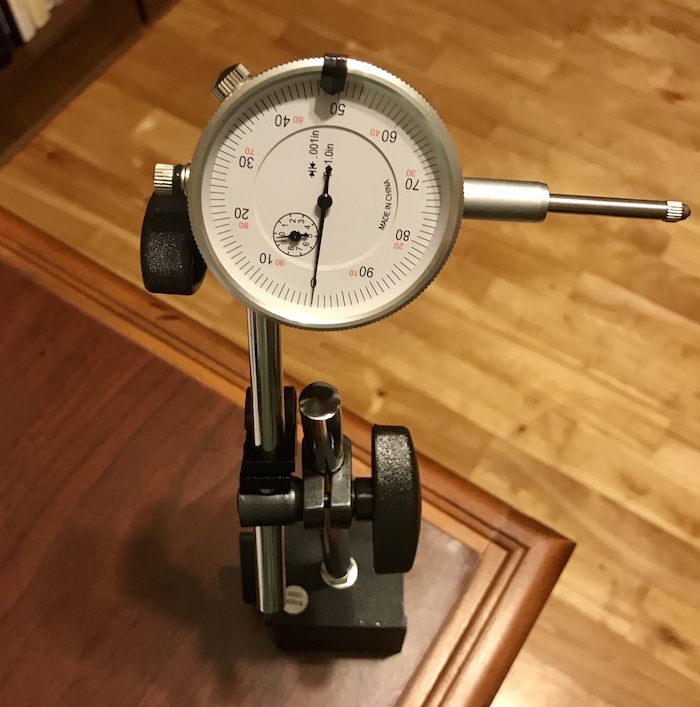
There are two most common types of dial indicator tools. The first one has a mount with a magnetic base that can be attached to any metallic surface on or near your car. I personally got the one with magnetic base since I usually work on my cars off the ground. I also think this mount is more stable and easy to set up.
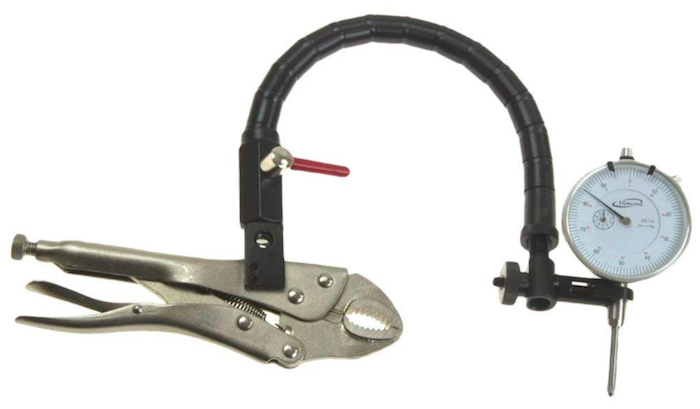
The second type uses a clamp-on mount that can be easily attached to many different parts of the suspension system near the brake rotor. This mount can be more convenient when using a car lift. It may also be useful when there is not enough space or if there are no magnetic parts to attach the dial indicator with a magnetic base (suspension parts are often made out of aluminum).
It is up to you which tool you prefer or what works best in your particular situation. You can find one of these tools at your local auto parts store, or check out current online prices here.
Measuring procedure
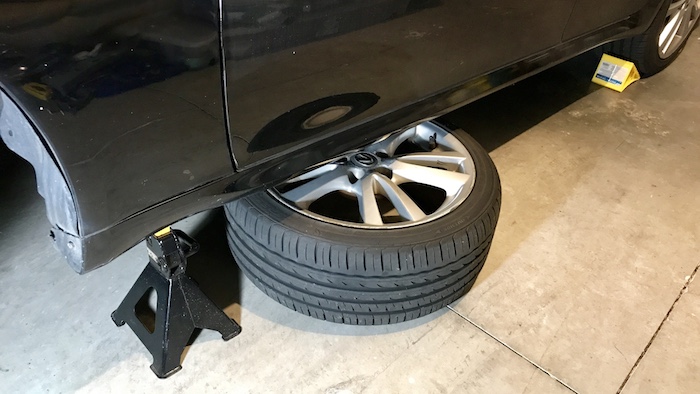
- Use wheel chocks to prevent the car from rolling. Safely and properly jack up your car and place it on the jack stand. Remove the tire and place it under the side of the car for extra safety.
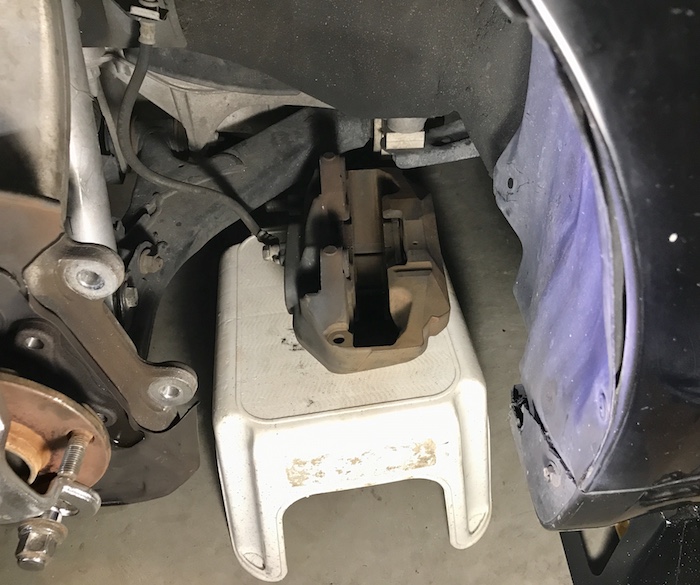
- Next, you will need to remove the brake caliper assembly. Make sure to be careful and do not damage the brake fluid hose. Hang the brake caliper using a wire or bungee rope, or place it on a platform, such as a step stool or a bucket.
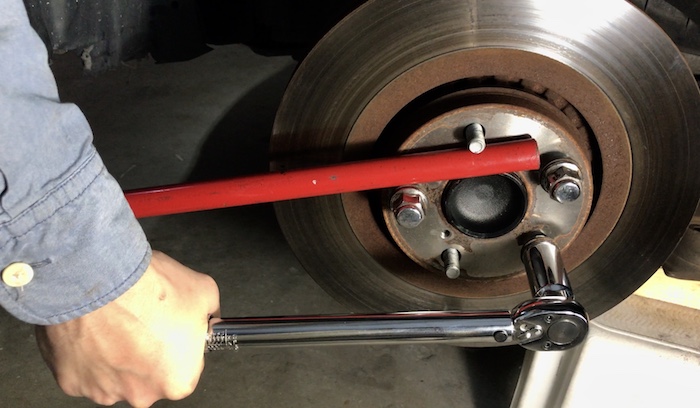
- After removing the brake caliper we are going to tighten the brake rotor using wheel lug nuts. You can use a tool shown below or a large pry bar for holding the brake rotor to prevent it from rotating.

I didn’t have any of these tools so instead, I used a handle from my floor jack to prop the rotor between two lug nut studs and it worked out pretty well.
You can also stick a large heavy duty screwdriver into the air vents in the center of the brake rotor (some rotors may not have those air vents) to prevent it from rotating. Or else you can make your own version of this tool by welding a large nut to the end of a metal rod, or by drilling a hole in a long narrow piece of metal.

- Official repair manual for my car recommends using three lug nuts. I personally prefer to use all 5 lug nuts to evenly distribute the pressure in order to get the best possible measurements.
- Gradually tighten the lug nuts in a star pattern if you decide to use all 5 of them. Torque them to 103 N*m (1,050 kgf*cm, 76 ft.*lbf) using a torque wrench. If you don’t have a torque wrench, most auto parts stores will allow you to rent it for free for up to 24 hours. Otherwise, you can get an entry level torque wrench starting at around $30.
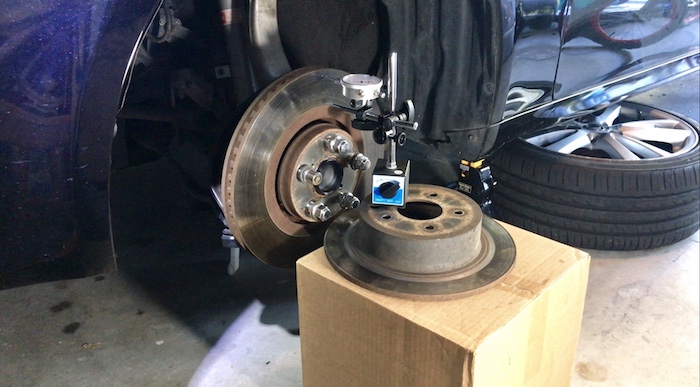
- Now we are ready to set up a dial indicator tool. I placed it on top of a box and used an old brake rotor as a base.
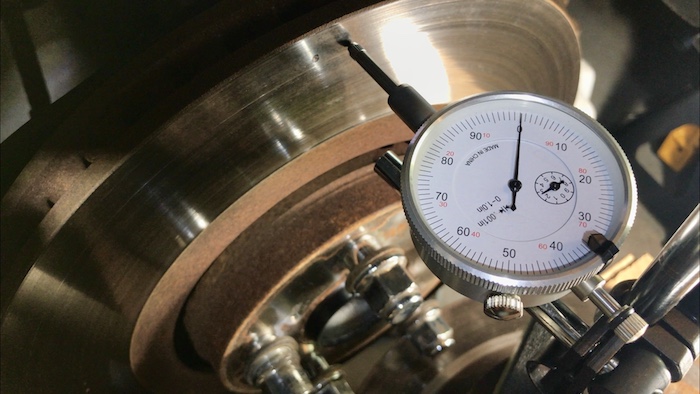
- Next, we are going to measure runout 10mm (0.4 in.) from the outer edge on a smooth flat portion of the rotor. Make sure there is no dents, groves or other imperfections that could affect the accuracy of the measurements. If the rotor surface is uneven, you may have to turn or grind your rotors first.
- Place the dial indicator needle against the rotor.
- Next, find the lowest spot on the brake rotor by rotating it slowly a full 360 degrees circle. Align the zero mark on the adjustable bezel with the lowest spot on the brake rotor. Rotate the rotor 360 degrees and notice the highest runout value. Make at least 3 more full rotations and make sure you are getting consistent measurements every single time.
- Mark the lowest and the highest spots on the rotor using a pencil or marker (we will need this later when trying to correct excessive runout).
- The maximum runout for most cars should not exceed 0.002 in (0.05 mm). On my car there runout was 0.004 inch. This explains why my brake pedal was pulsating and the steering wheel was vibrating when applying brakes.
How to correct excessive runout
- When runout exceeds the maximum value, try to change the installation position of the disc rotor so that the runout will become minimal.
- If the runout exceeds the maximum allowed value even when the installation position was changed, remove the brake rotor and check for bearing looseness and the bearing hub runout. If runout is still more than 0.002, but less than 0.009 inch – it might be possible to correct it using correction palates or shims. Replace the bearing hub if runout still can’t be corrected.
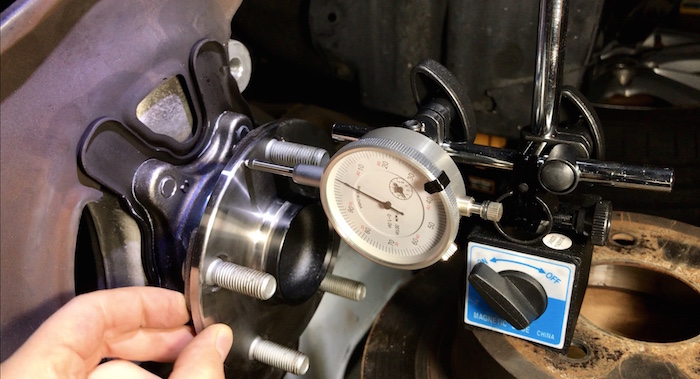
- If the bearing hub runout is normal, you can combine the highest point on the rotor with the lowest point on the hub (or vice versa) so they can cancel each other out.
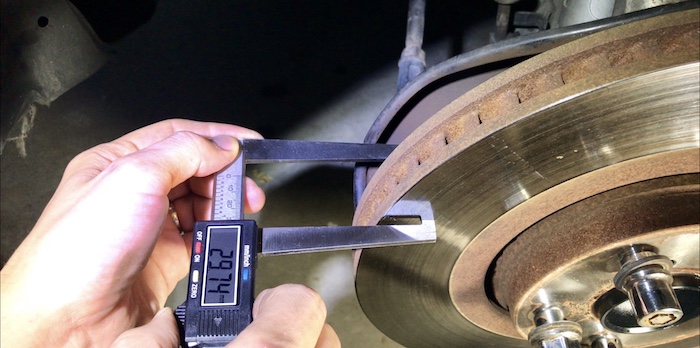
- If the runout is still greater than 0.002 inch and the rotor thickness is still acceptable, you can try to turn or grind the rotor. For example, allowed brake rotor thickness for my car is 27-30 mm (refer to the repair manual for minimum allowed disk rotor thickness for your particular car). I used a digital micrometer to measure the thickness of my rotors. The thickness was 29,74 – which is still plenty for the rotor to be turned. If your rotor is too thin to be turned, you will have to replace it.
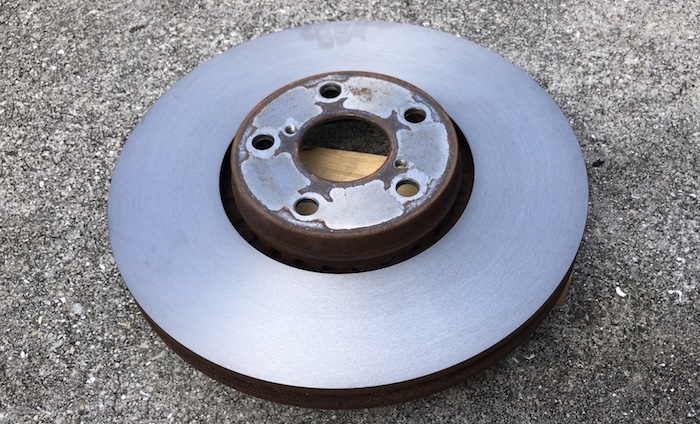
- I took my warped rotor and had it turned for $12 at my local auto parts store. After turning the rotor, install it on the car and measure runout again. Turning rotors doesn’t always fix the problem of excessive runout. In my case, after turning the rotor runout decreased from 0.004 to 0.002 inch.
- If excessive runout still can’t be fixed after turning the rotor, it will need to be replaced.
- After you are finished, re-install everything in the reverse order of removal.
- Pump the brake pedal and make sure brakes are working properly before driving.