
Recently all of a sudden our automatic garage door opener stopped working, so I did some research to find out what was wrong with it and how to fix the problem.
Garage door opener motor can fail due to several different reasons, but the most common reason for failure is an insufficiently lubricated garage door. The door starts getting a lot of friction and resistance when closing and opening, which in turn puts a lot of pressure on the motor unit. The plastic gears inside the motor start wearing out very quickly and eventually get stripped or break down. To fix the problem, damaged parts and gears inside the motor unit should be replaced and the garaged door needs to be lubricated properly. Let’s take a look at how to do this with detailed step by step instructions and pictures. In our case, this is a Linear garage door opener, but a similar process might be applied when working with other brands such as Liftmaster, Chamberlain, Craftsman, Skylink, Ryobi, and others.
Symptoms
- Grinding noise inside the motor unit.
- The garage door would not open when trying to use a car remote when driving up to the house.
- I tried to use Open/Close buttons on the wall control inside the garage, but they didn’t work either.
- The motor was working, as I could hear it spinning, but the chain wasn’t moving at all and the garage door wasn’t opening.
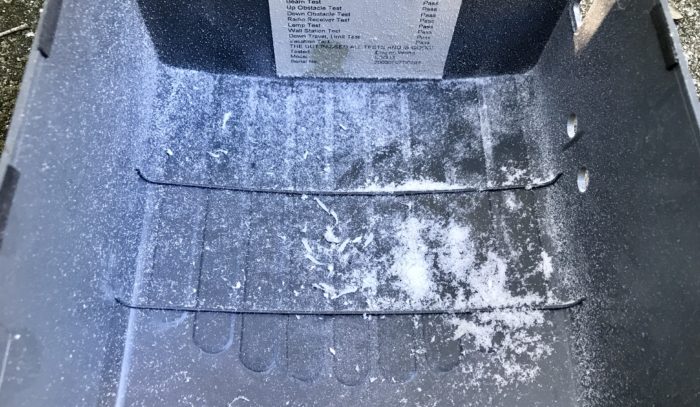
- I removed the plastic cover for the motor assembly and discovered a lot of plastic shavings on the bottom of the cover.
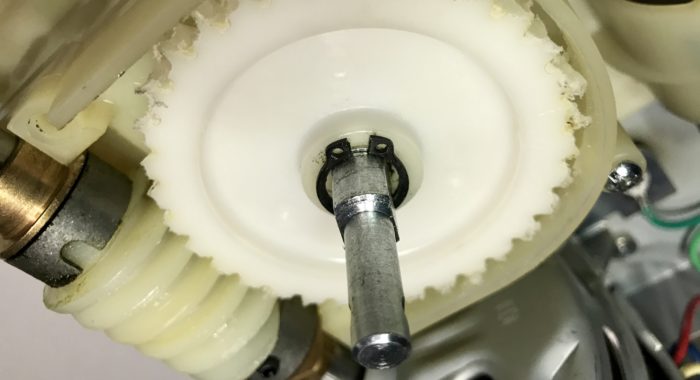
- I also noticed that one gear was heavily worn out with all teeth almost completely stripped.
Possible Causes
- Normal wear and tear can be one of the reasons for the failure. Our garage door opener is about 15 years old, so it’s not that unusual for the motor to break down after so many years of service.
- An insufficiently lubricated garage door can contribute to the problem. The door becomes much harder to open and close, putting more load on the motor and eventually causing it to break down prematurely.
- Insufficient lubrication inside the motor unit itself.
WARNING
Working on garage doors can possibly cause SERIOUS INJURY or DEATH. The following parts of the garage door are under EXTREME tension: cables, torsion springs, pulleys, brackets or their hardware. NEVER try to work on, repair, move, adjust or loosen those parts without proper training and safety equipment to avoid serious injuries. ALWAYS call qualified garage door service company if your garage door is out of balance, binds or sticks, or if you need assistance with repairing other serious problems with your garage door. All content provided on this website is intended for informational purposes only and cannot be held liable for any injury, damage, or problems that arise when trying to duplicate steps described here. This information is provided “as is” without any representations or warranties and should not be treated as advice. This information is not guaranteed to be accurate. Do it at your own risk.
Eliminate the Source of the Problem
Before you go ahead and fix your garage door opener, you may want to find out why it broke down in the first place. Otherwise, you will be fixing it again soon. If your garage door was very squeaky and loud when closing and opening, it needs to be lubricated properly.
Inspect Garage Door Rollers
It is also a good idea to inspect and if necessary replace any damaged rollers. Carefully push the garage door away from the track and check if the rollers can spin freely. Ball bearings may go bad over time and if not taken care of can lead to more serious and costly damage.

How To Replace Worn Out or Stripped Linear Garage Door Opener Gears
- Unplug the power cord. You will be working with or near the electric motor, high voltage wiring, and the circuit board during this repair. Disconnect power cord to avoid getting killed, shocked or seriously injured, and to prevent causing damage to the equipment. You may also need a stepladder to reach the garage door opener. The power outlet is usually located on the ceiling close to the motor unit.
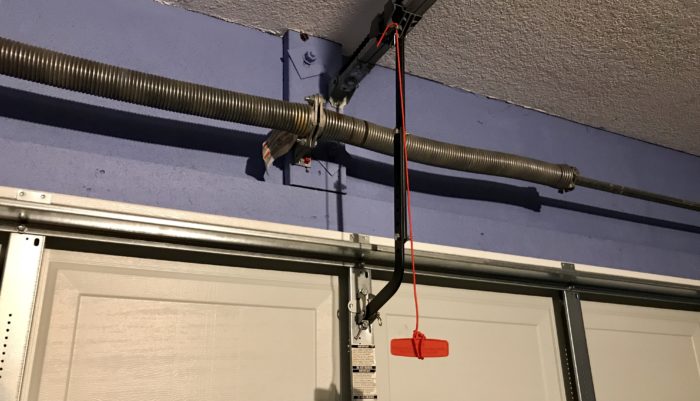
- Lower the garage door if necessary. If the garage door is not already closed, pull down and back towards the motor unit the red emergency release rope and lower the garage door. This will ensure that you don’t get accidentally hurt while working inside the motor unit if the door starts rolling down on its own.
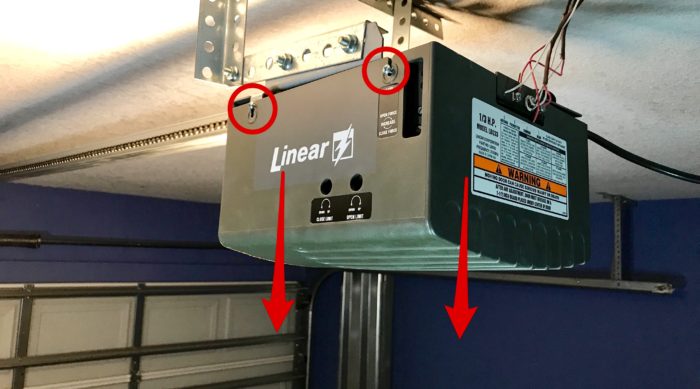
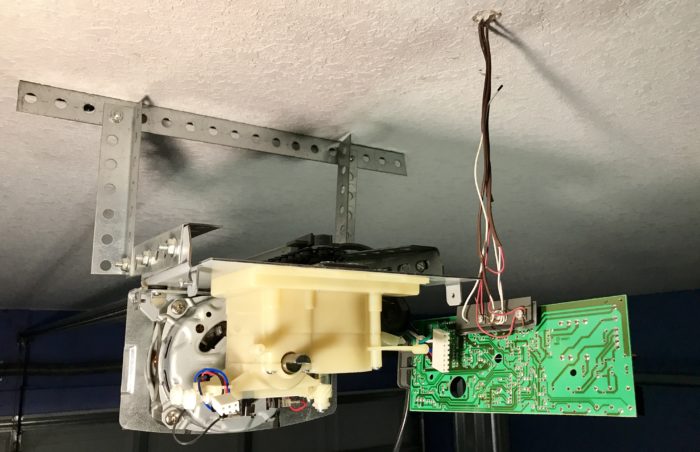
- Remove the motor unit cover. There are four screws (two on each side of the motor housing) holding the cover. Loosen or remove those screws and pull down the cover and remove it from the motor assembly. To avoid losing the screws you can either place them in a secure place or screw them back in the same holes they came out of. Luckily this particular garage door opener is very easy to service and you won’t need to remove the entire motor, sprocket assembly, drive chain, etc.
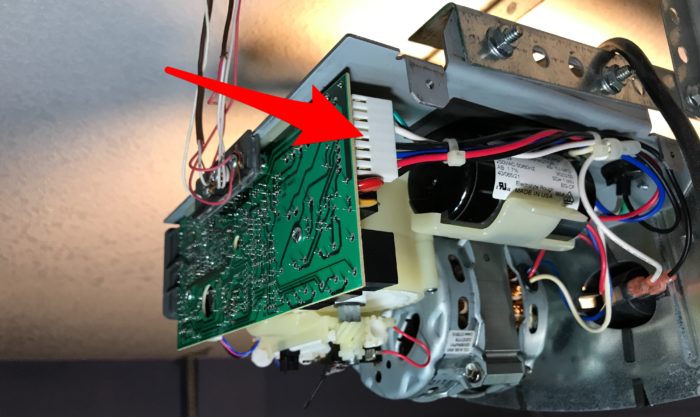
- Disconnect both wire harnesses connected to the circuit or logic board. They are located on the opposite sides of the logic board.
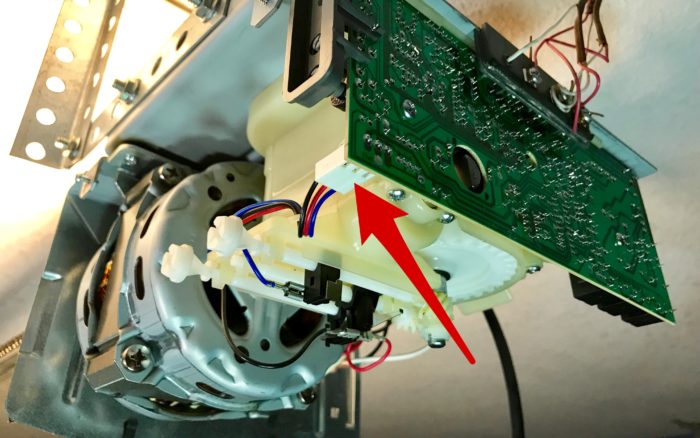
- Remove the logic board. It is held in place by two Phillips screws.
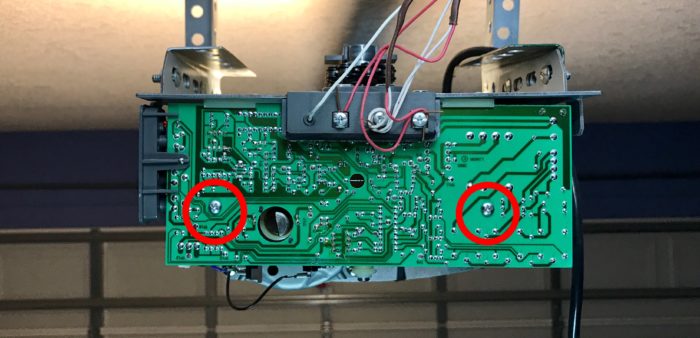
Remove both screws, carefully move the logic board to the side, and leave it hanging on the wires. Don’t waste time trying to disconnect the wires to remove the logic board, just be very mindful and don’t damage it while working on other things.
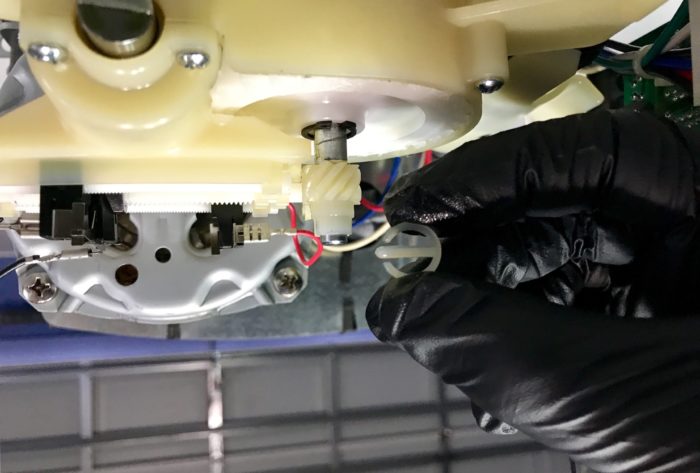
- Remove the plastic E-shaped retainer for the helical gear on the bottom of the drive shaft. You will need to push on the pin going through the hole on the bottom of the drive shaft and then pull off the retainer out and away from the shaft.
Use latex gloves, as there might be a lot of lubricating grease inside the motor unit.
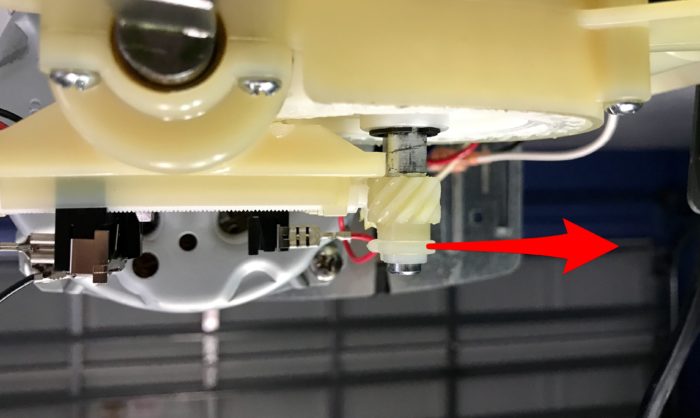
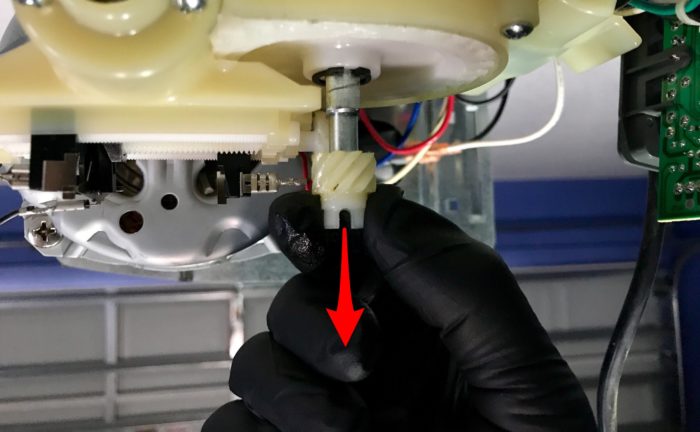
- Remove the limiter gear on the bottom of the drive shaft. Simply pull it down and then take it off of the drive shaft.
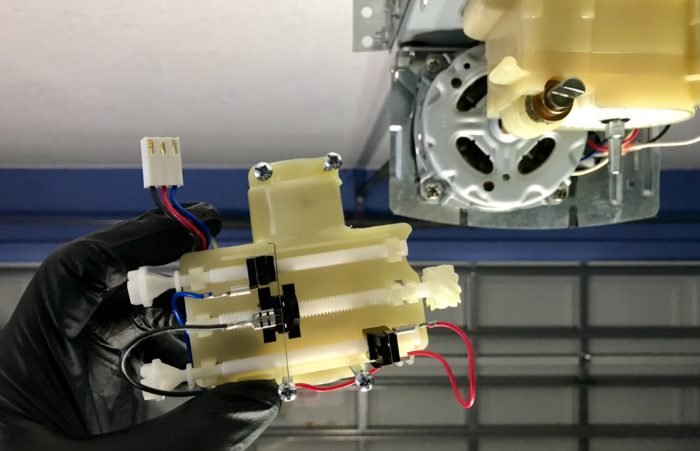
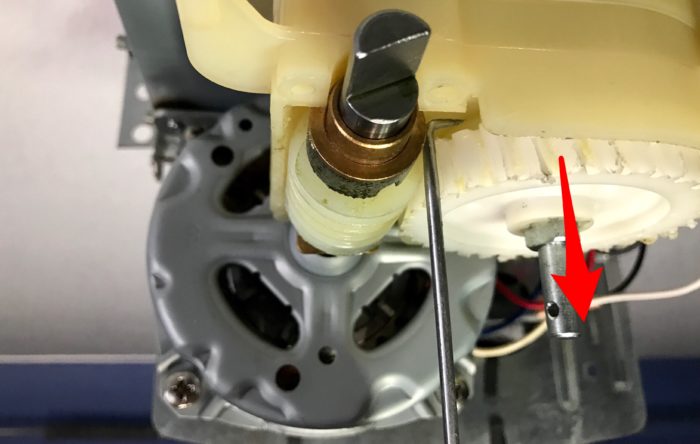
- Remove the limit switch assembly. For that, you’ll need to remove four long Phillips screws. You can access them from underneath the motor assembly.
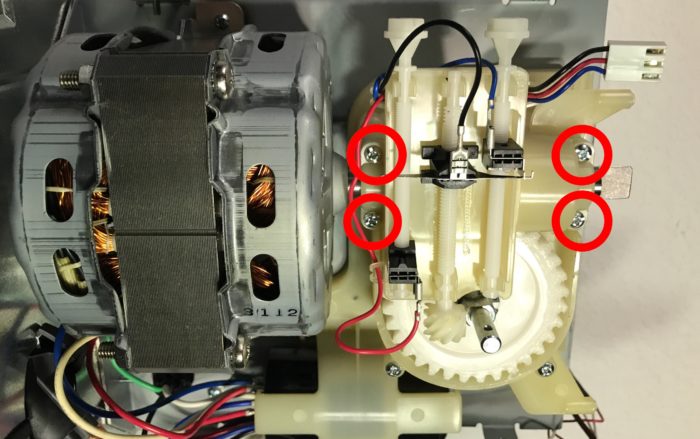
Be very careful and try not to mess up the limit switch assembly to avoid re-configuring it after the repair is finished.
- Remove the snap ring for the helical gear. Ideally, you will need a pair of snap ring pliers for that.
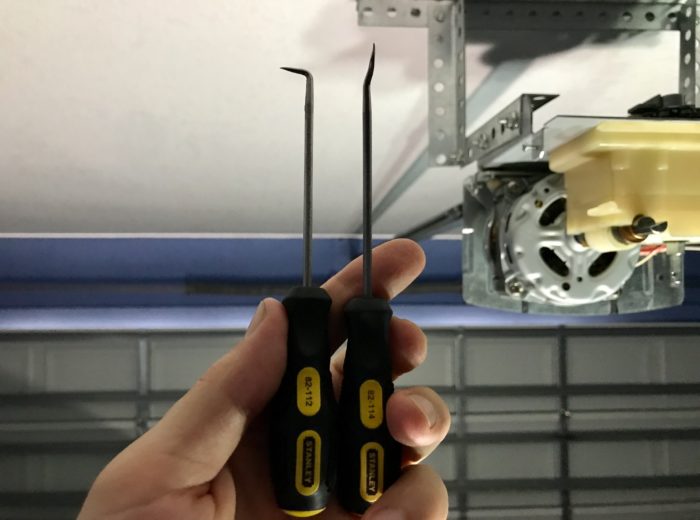
If you don’t have snap ring pliers, you can just use a hook and pick set to remove the snap ring. It will be a little more challenging, but you should still be able to take the snap ring out.
- Slide the helical gear off of the drive shaft. You can use a hook tool to pull the gear down. Turn the worm gear back and forth if the helical gear is not coming off easily.
- Inspect the rest of the motor unit and write down all broken or worn out parts that need to be replaced. Inspect and if necessary replace the sprocket assembly.
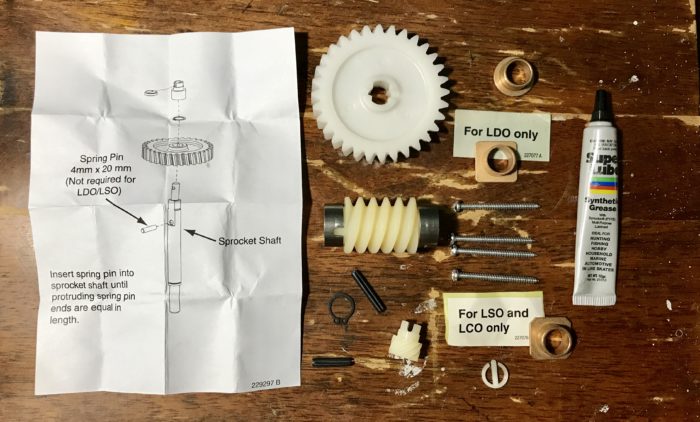
- Order replacement parts. Depending on the extent of the damage you may need to replace just one or multiple parts. When possible it is recommended to use original OEM replacement parts for perfect fit and reliability. To find the correct parts you will need to find the exact model number of your garage door opener. You can usually find it on the information sticker on the side, in the front or in the back of the motor housing. For example, I found an OEM gears repair kit for my Linear LD050 garage door opener sold by the manufacturer for less than $15 here (this is an Amazon affiliated link). It included every serviceable part I could possibly need to this repair and even had the lubricating grease included.
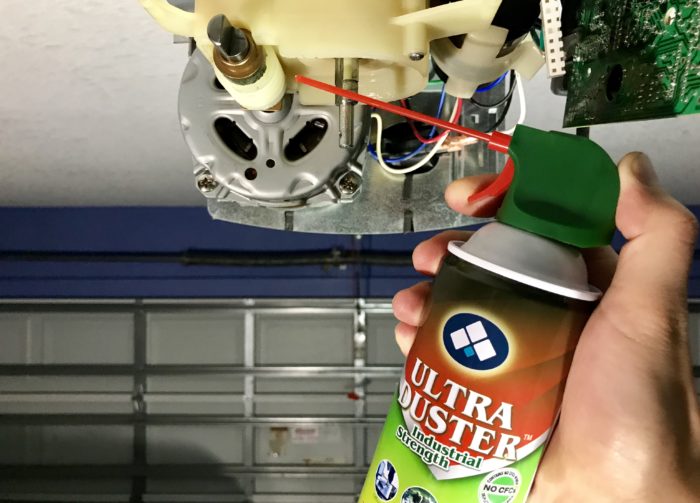
- Clean the inside of the motor unit. Before installing new parts, use a compressor with a hose to blow off debris and plastic shavings trapped inside the motor unit. I personally don’t have a compressor, so I just used compressed air duster instead, and it worked just fine.
Installation Procedure
Use all necessary replacement parts and reassemble the garage door opener in the reverse order. I only had one stripped gear, while the rest of the parts looked OK. If you have any other broken gears or parts, replace those as well.
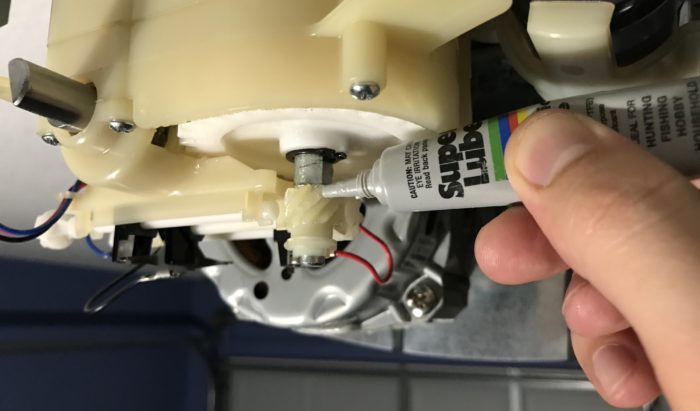
Lubricating the Garage Door Motor Unit
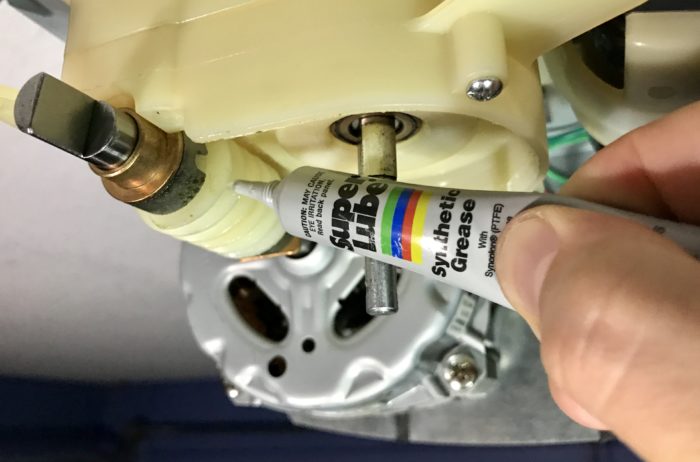
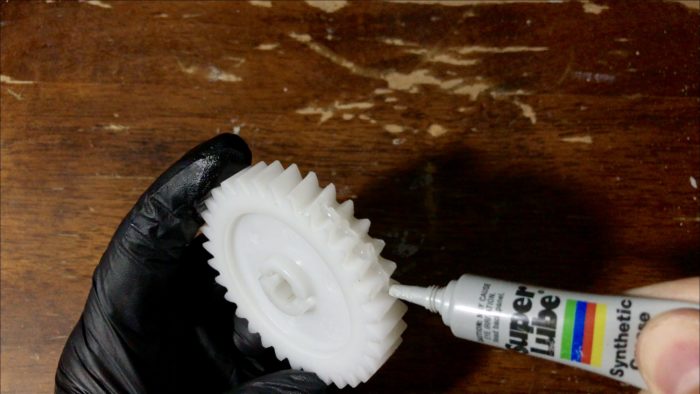
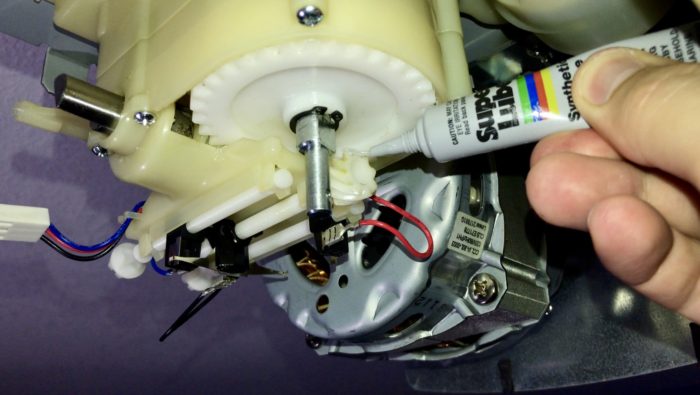
As you are reassembling the motor unit, lubricate all gears, bearings, bushings, shafts and other moving parts using the synthetic grease included in the repair kit. Following are just a few examples of what should be lubricated inside the motor unit.
Lubricate the worm gear.
Lubricate the new helical gear before installing it. It will be much easier to do this if the gear is off of the drive shaft.
Lubricate the small gear on the limit switch assembly.
Lubricate the limiter gear on the bottom of the drive shaft.
Test the Motor Unit
After you reassembled the motor unit, do not reconnect the trolly just yet. Carefully test the motor unit operation first. Use a remote or wall control buttons and be prepared to stop the motor if something goes wrong or if you hear grinding or other unusual noises. Make sure the upper and lower limits are set up properly. If the garage door limits or the trolly chain got out of alignment during swapping the gears, you will need to re-adjust them.